 Save
Save My neighbor knocked on the door that Fourth of July morning with a batch of something that didn't quite work out, and we laughed about how her brownie batter had split in the heat. By afternoon, I was in my kitchen with flour dust settling on everything, determined to create something that would actually survive a backyard party without melting into a sad puddle. These little brownie bites happened because I wanted something bite-sized, fudgy enough to impress, but sturdy enough to stay beautiful under the summer sun and under scrutiny from eager hands.
I brought these to a block party where someone's kid bit into one and declared it tasted like fireworks, which became the family joke for the rest of summer. That moment—hearing genuine excitement about something I'd made—made me realize these weren't just desserts; they were little edible celebrations that made people happy in a way regular brownies somehow couldn't.
Ingredients
- Unsalted butter: Use good quality butter because it makes the chocolate flavor sing instead of getting drowned out by salt.
- Granulated sugar: This creates structure and helps the bites stay firm, which matters when you're topping them with frosting.
- Large eggs: Room temperature eggs mix in smoother and create a better crumb than cold eggs straight from the fridge.
- Vanilla extract: Just a teaspoon goes a long way, bringing out the chocolate without announcing itself.
- Unsweetened cocoa powder: Don't skip this by using chocolate chips; the powder gives you real chocolate flavor and better texture.
- All-purpose flour: Measure it by spooning into your cup and leveling off, not by scooping straight from the bag, or your bites will be too dense.
- Salt and baking powder: These seem small, but they're what keep the bites from tasting flat and one-note.
- Cream cheese frosting: The cream cheese is non-negotiable here because it holds its shape better than regular buttercream in heat and tastes incredible against chocolate.
- Powdered sugar: Sift it first if you have lumps, or you'll end up with gritty frosting that nobody wants.
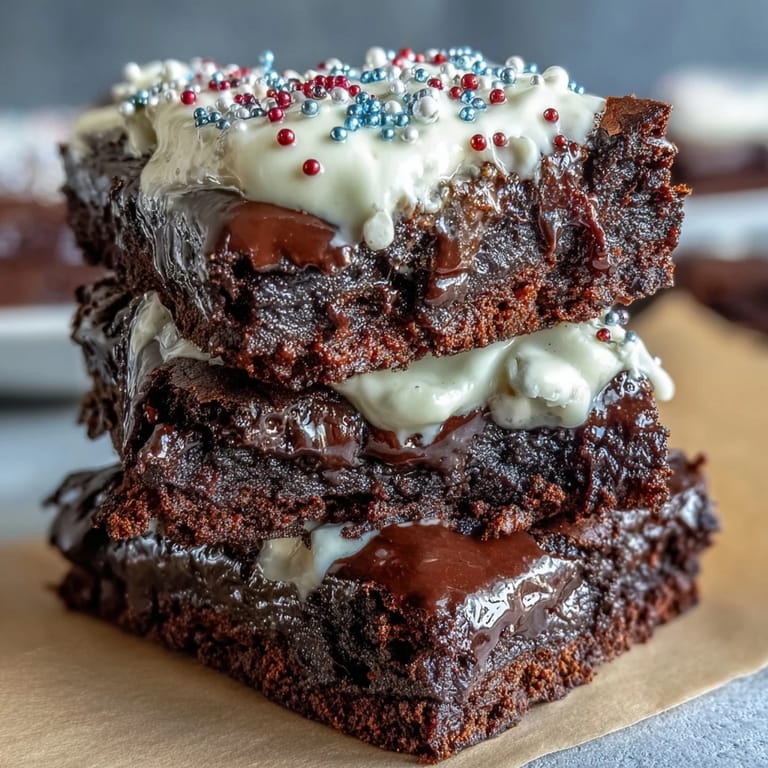
- Red, white, and blue sprinkles: These are your edible confetti, so pick ones you actually like because they're the first thing people see.
Tired of Takeout? 🥡
Get 10 meals you can make faster than delivery arrives. Seriously.
One email. No spam. Unsubscribe anytime.
Instructions
- Get Your Setup Ready:
- Preheat your oven to 350°F and grease those 24 mini muffin cups or line them with paper liners. Having everything ready before you start mixing is the difference between a smooth process and scrambling halfway through.
- Melt and Mix:
- Melt your butter in the microwave, then stir in sugar, eggs, and vanilla until it looks smooth and a little glossy. This should take about a minute of stirring; you want everything incorporated but not over-beaten.
- Add the Chocolate Magic:
- Sprinkle in the cocoa powder, flour, salt, and baking powder, then stir gently just until you don't see any white flour streaks anymore. Stop as soon as everything comes together because overmixing makes brownies tough and crumbly instead of fudgy.
- Fill and Bake:
- Using a small spoon or cookie scoop, fill each muffin cup about three-quarters full; you want room for them to puff up slightly without overflowing. Bake for 12 to 15 minutes until a toothpick inserted in the center comes out with a few moist crumbs still clinging to it—this is the secret to keeping them fudgy.
- Cool with Patience:
- Let them sit in the pan for 5 minutes so they firm up, then transfer to a wire rack to cool completely. Trying to frost warm brownies is a losing battle, so patience here pays off.
- Make the Frosting:
- Beat softened cream cheese and butter together until creamy, then gradually add powdered sugar and vanilla while beating. Add milk one tablespoon at a time until you get a consistency that's thick enough to hold its shape but soft enough to pipe.
- Frost and Celebrate:
- Once the brownies are completely cool, pipe or spread a generous dollop of frosting on top of each one. The frosting should be thick enough that it doesn't slide off but smooth enough that it looks intentional and pretty.
- Add the Patriotic Touch:
- Sprinkle red, white, and blue sprinkles all over each frosted bite, or go wild with edible glitter or sparkler toppers if that's your style. This is where your bites transform from simple brownies into little celebration bites.
 Save
Save There's something deeply satisfying about making tiny versions of things people love, and these brownie bites captured that magic perfectly. They became the thing people asked about, the thing that disappeared first from the dessert table, the thing that made a simple holiday gathering feel a little more special.
Why Brownie Bites Beat Regular Brownies
The portion size is honestly genius because you get all the fudgy chocolate satisfaction without that guilty feeling that comes from cutting yourself a big wedge of a full-size brownie. Mini bites also mean every single one gets frosted and decorated, so there's no bare brownie hanging out looking lonely on the platter. Plus, people feel more comfortable eating several small bites than eating several large brownies, which means you can make fewer bites and feel more generous because they seem to multiply once people start snacking.
Storage and Make-Ahead Magic
You can bake these the day before and store them unfrosted in an airtight container at room temperature, then frost them a few hours before your gathering. If you're baking them in advance, skip the paper liners because they'll stick to the liners, but with proper liners they peel off beautifully and stay intact. Storing them in the refrigerator extends their life because the frosting helps preserve the brownie, keeping everything moist and delicious for up to three days.
Variations That Keep Things Interesting
I've added a pinch of espresso powder to the batter to deepen the chocolate flavor, swapped in almond extract for vanilla, and even mixed crushed cookies into the frosting for texture. The beauty of these little bites is that the base recipe is so forgiving you can play with it endlessly without losing what makes them special. For a gluten-free version, use a quality gluten-free flour blend in a 1:1 ratio and bake for an extra minute or two since gluten-free batters sometimes need slightly longer.
- Try adding pop rocks to the frosting for a fun fizzy surprise that actually tastes good with chocolate.
- Swap the cream cheese frosting for chocolate frosting if you want pure chocolate decadence from top to bottom.
- Make these year-round by switching out the patriotic sprinkles for whatever colors match your celebration.
 Save
Save These little bites remind me that sometimes the best memories come from small, thoughtful details—not from impressive size or complexity. Make these once and you'll find yourself making them again and again, each time for a different reason to celebrate.
Recipe FAQs
- → What ingredients provide the fudgy texture?
The combination of butter, sugar, eggs, and cocoa powder creates a moist and fudgy texture in these brownie bites.
- → Can I use gluten-free flour?
Yes, substituting all-purpose flour with gluten-free flour works well for a gluten-free option.
- → How do I achieve a creamy frosting consistency?
Beat softened cream cheese and butter together, then gradually add powdered sugar and a bit of milk until smooth and spreadable.
- → What is the best way to decorate the brownie bites?
Sprinkle red, white, and blue sprinkles on the frosting and optionally top with mini sparklers or festive picks for a celebratory look.
- → How long do the brownie bites stay fresh?
Store in an airtight container in the refrigerator for up to 3 days to maintain freshness.